Craftsmen in 18th Century Williamsburg

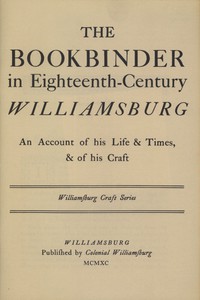
The Bookbinder in Eighteenth-Century Williamsburg by C. Clement Sanford and John M. Hemphill II
The good people of Williamsburg, Virginia, have produced a series of booklets on craftsmen operating there during the 18th Century and generously made them publicly available on Project Gutenberg.
While my site is about 18th Century Britain, the technologies in the Old World and the New would have been much the same. I have extracted some of the more relevant material but I urge you to look at the complete publication. Click on the cover illustration to go to the Gutenberg page.
I have extracted below the details of how to bind a book but there is more information at the Gutenberg link.
Binding a book
The following lists represent the minimum essentials for binding a book.
Materials
- printed or blank paper (the contents of the book)
- decorative paper for fly-leaves
- long-fibre tissue for mending torn pages
- hemp cord or leather thongs for crossbands
- linen thread for sewing
- silk thread for headbands
- pasteboard or milled board
- calfskin for outer cover
- piece of morocco for label
- leather dressing
- gold leaf
- animal glue
- wheat paste
- vinegar
- egg white
Tools & Equipment
- stitching frame
- paring stone
- gluepot
- pastepot
- water basins
- laying presses
- trimming press and plough
- press boards
- bone folder
- skiving knife and other knives
- scissors
- needles
- stone or lead weights
- paste and glue brushes
- metal straightedge
- backing hammer
- awl
- knife and cushion for gold leaf
- brass alphabet stamps
- brass decorative stamps
- brass decorative rolls
- heater for gluepot and brass tools
The printer’s job was done when the flat sheets of paper came off his press, each sheet containing four or more printed pages arranged so that folding would bring the pages into proper sequence. The binder’s first task was to fold the sheets into “signatures” of four, eight, twelve, or sixteen pages.
Sheets folded once—into two leaves, a four-page signature—made a large-format book called a “folio.” Two folds in each sheet made eight-page signatures and “quarto” books. Three folds gave “octavo” volumes of sixteen-page signatures. A different arrangement of folds produced twelve pages in a signature and a “duodecimo” book. For any number of folds, however, a bone or ivory folder—a thin, smooth blade—was essential for rapid and accurate work. And it came in handy for a number of other binding operations, too.
After he had folded all the printed sheets, the binder gathered a full set of signatures in the proper order to make the book. On his stitching frame—which was simply a four-piece vertical framework, the upper crosspiece adjustable in height—he stretched four to six leather thongs or pieces of hemp cord. With needle and strong linen thread he then stitched the signatures, one after another, through their center folds to each of the crossbands. The sewing frame held them parallel to each other and at right angles to the pages.
These bands gave bound books their flexibility and created the ridges across the spine characteristic of most of them. The stitch used in sewing the signatures to the bands was about as simple as could be, but it cannot be duplicated by any machine yet devised. The crossbands and the stitching together were the keys to the all-but-everlasting durability and the flat opening of the well-made book.
The binder next squared up the back of the book and applied glue to it. When dry, he put the book in the trimming press and trimmed the fore edge, head, and tail, then with his backing hammer rounded off the spine. Having cut the boards just a bit larger than page size, he punched holes through them close to their back edges. These holes he spaced in pairs to match the position of the bands, which he laced through the holes, pasted firm, and pounded smooth.
Very little the binder had done so far would be visible in the finished product. But at this point he could begin to put his artistry on display. Selecting silk thread in two colors to suit his taste, he bound a narrow piece of leather across both the top and bottom of the spine, completely covering them with something like a buttonhole stitch. These “headbands” added little to the strength but much to the appearance of a book. Careful binders said that a book should no more be seen in a library without headbands than a gentleman should appear in public minus a collar.
Next came the “drawing on” of the cover. The binder cut a piece of calfskin approximately ¾ inch larger all around than the covers of the book opened out flat, and with his skiving knife pared the margins of the leather very thin. After the leather had been well soaked with water on the outer or grain side and with paste on the inner side, the binder carefully molded it around the spine and smoothed it onto the boards—being careful not to stretch it. The pared margins were then turned in and the volume, except for minor touches and drying, was finally ready to be decorated.
Having decided on the pattern of decoration he wished to apply, the binder heated the appropriate brass tools to “blind in” the design. The tools had to be hot enough to make a sharp impression in the leather, but not hot enough to burn it. Each had to be pressed into the leather with just the right weight—not too much and not too little—to produce the desired effect.
If the pattern was also to be gilded, the binder prepared a solution of white-of-egg, called “glair,” and painted it into the blind impressions. Having laid gold leaf thereon, he again pressed the same heated tools carefully in the same indentations. The excess gold was then wiped off and the leather cleaned with diluted vinegar and dressed with a good leather dressing.
Finally, the endpapers were pasted down to the insides of the boards and the book was complete. It took perhaps eight to ten hours of actual working time for a single volume, but spaced over as much as two weeks to allow drying time between processes.

